IP address restrictions
Enterprise organization owners can restrict login to specific IP addresses 🔒
You can restrict access to your organization’s workspaces by setting an allowlist of IP addresses that managed users can use to log in to Notion.
This can be useful if you want to restrict account access to users connecting from specific locations (such as your office) or through a specific VPN.
To set up allowed IP addresses, you must be an Enterprise organization owner.
To create a list of allowed IP address for your organization:
Open the workspace switcher and select
Manage organization. You may need toSet up organizationfirst if you haven’t already. Learn more here →Go to the
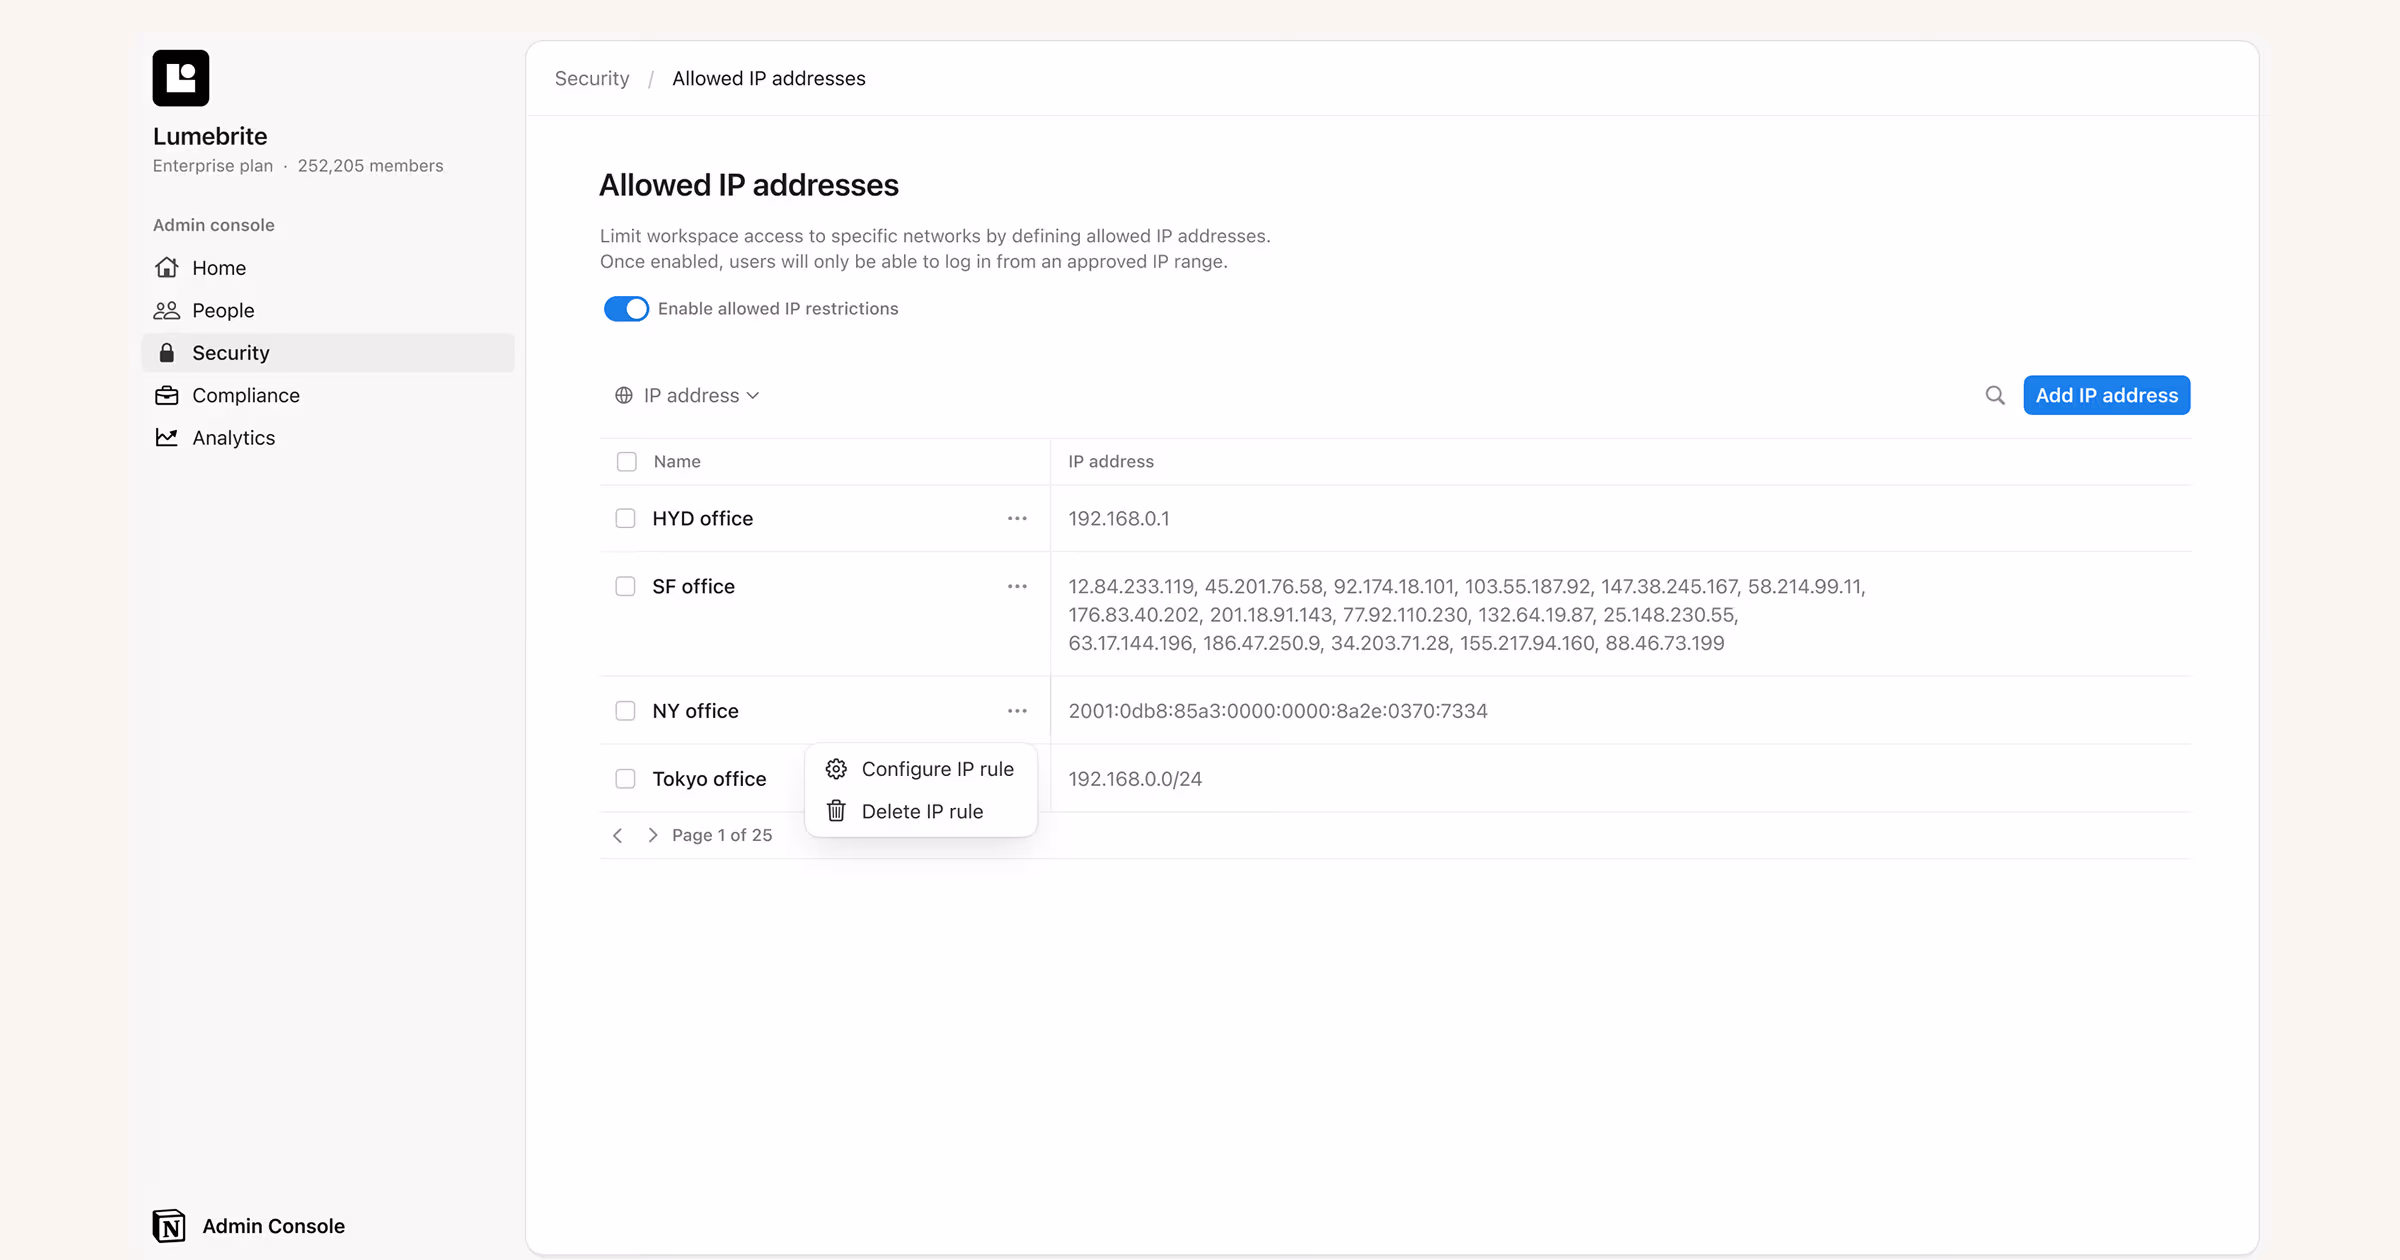
Securitytab and selectAllowed IP addressesin the IP Address Restrictions section.Select the
Add IP rulebutton to set up your first allowed IP address. Provide a name for your address (like “SF Office” or “NY Office”) and then enter the corresponding IP address. To set a range of IP addresses, you can use CIDR notation (e.g., 127.0.0.1/24). We support both IPv4 and IPv6 addresses. Each rule can contain up to 16 IP addresses or CIDR ranges, so you can create multiple rules if you need more.
To ensure that no one gets locked out of their account before all IP restrictions are set, we recommend that you add the relevant IP addresses first, then activate the allowed list afterwards.
After you've added a list of IP addresses that you want to approve for the account, select the
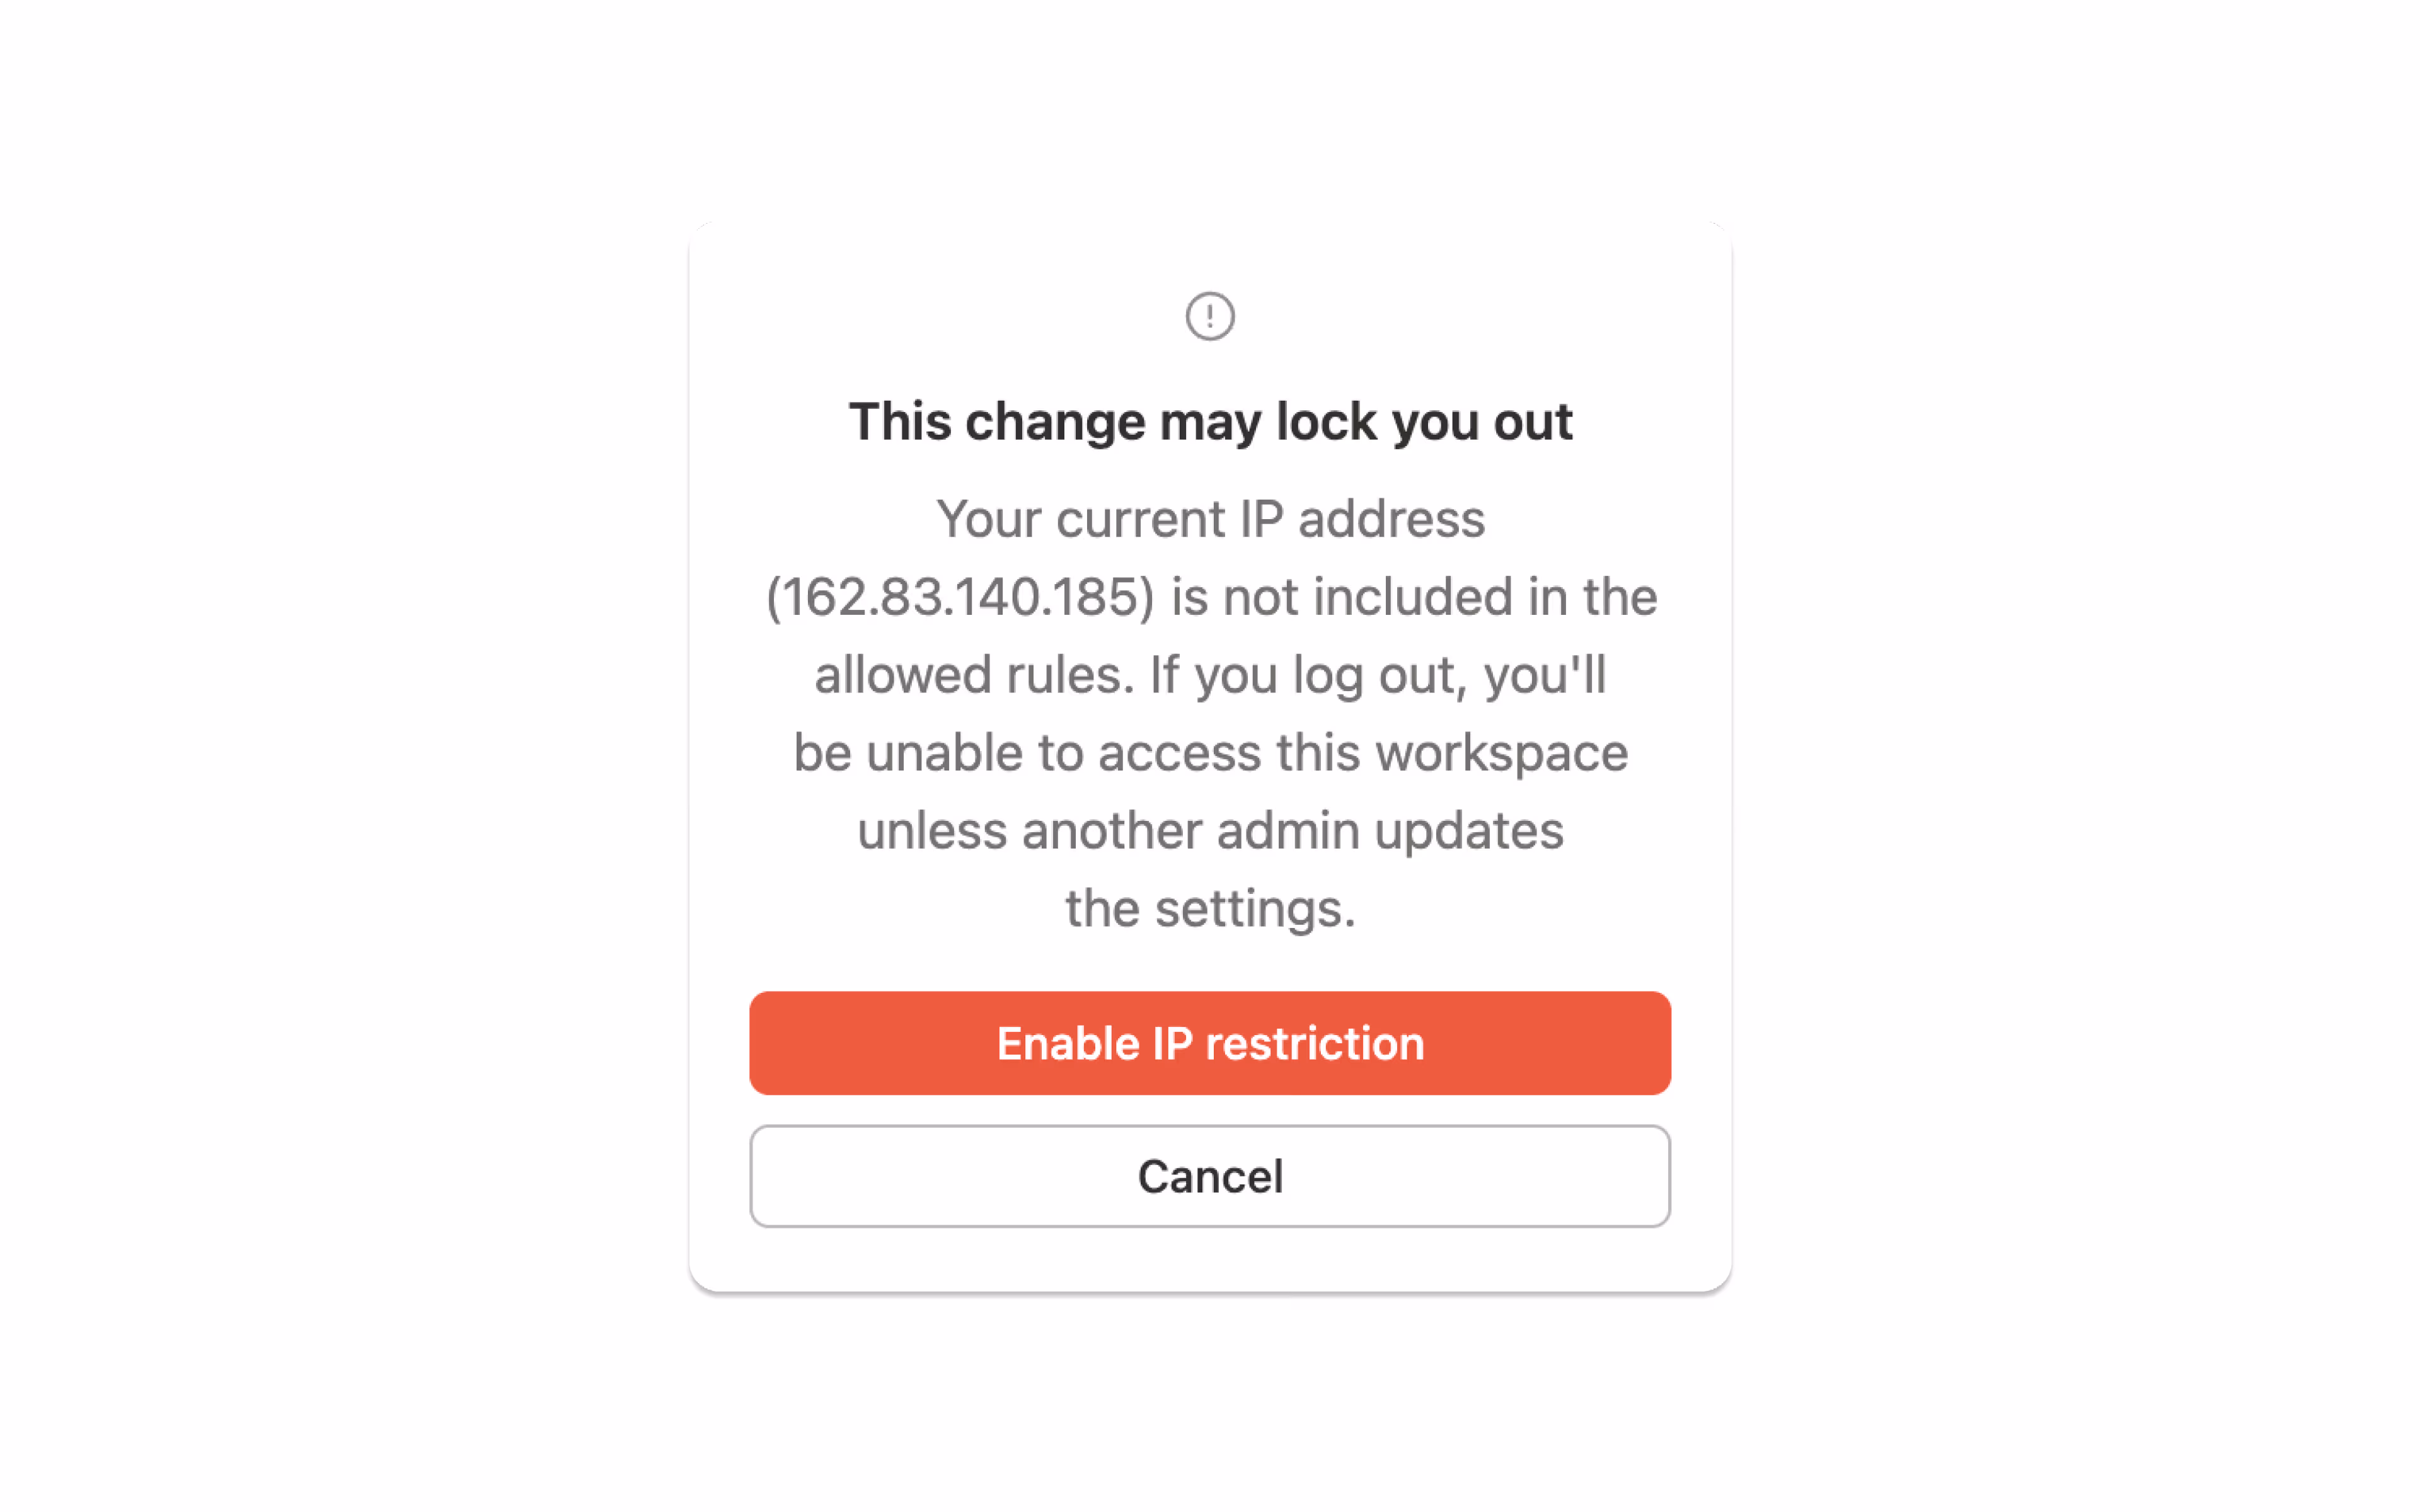
Enable allowed IP restrictionstoggle above the list to turn on IP address restriction.Ensure your own IP address is included in the allowed list. If it's not, you'll see a pop-up warning. If you choose to proceed, you may get locked out of your account per your IP restriction settings.
Once the allowed IP list is enabled, you’re all set. Users will only be able to access their accounts when they’re on an IP address included in the allowlist.
If a managed user attempts to sign in from an IP address that doesn’t match an address on the allowlist, they’ll see an error message and can’t proceed.
Previously, IP address restrictions were effectively enforced at login time only. That meant once a user authenticated from an allowed IP, their session could remain active for up to 90 days (as long as they stayed signed in), even if the device later moved outside the allowed IP ranges.
Admins can now control session behavior using the enforcement setting, which appears after restrictions are enabled.
Maintain session (default): Sessions continue even if the device's IP leaves the allowed range. Restrictions are enforced at the next login.
Require re-authentication: The session ends as soon as the device's IP leaves the allowed range, and the user must sign in again.

When you’re managing IP addresses for your organization, you’ll have access to the following audit log events:
Created IP allowlist: That a user created an IP allowlist rule.
Deleted IP allowlist: That a user deleted an IP allowlist rule.
Updated IP allowlist: That a user updated an IP allowlist rule.
Enabled IP allowlist: That a user either enabled the IP allowlist rules.
Disable IP allowlist: That a user either disabled the IP allowlist rules.
Changed enforcement mode: That an admin changed the session behavior setting.
